Get Started with GetAddress
Use GetAddress from a standalone web page or follow the steps below to install it in your HubSpot portal.
Choose your workflow
Use the standalone web lookup
Choose Standard or Enterprise, sign in, and open the browser lookup. No HubSpot installation or Hub ID is required.
Standalone setupInstall in HubSpot
Create an account, connect the app with OAuth, add the CRM card and optionally configure custom field mappings.
HubSpot setup stepsAlready installed / have an account?
(Or upgrading from UKPostcodes.org / ZipcodeInfo.org)
Create Your Account
Visit the pricing page and choose the plan that suits your team, or start with a free trial — no credit card required.
The free trial includes 5 lifetime HubSpot address lookups. Both paid plans include unlimited HubSpot CRM-card searches; standalone web lookup includes 100 monthly searches on Standard and 250 on Enterprise.
Install the HubSpot App
After registration, click here to install GetAddress directly into your HubSpot portal.
You will be asked to grant permissions for reading and writing Contact and Company records. The install flow will securely link your HubSpot portal to your GetAddress account using OAuth.
You can also find the app on the HubSpot Marketplace.
Add the Card to Your Record Layout
After installing the app, you need to add the Address Lookup card to your Contact and Company record layouts. Follow these steps:
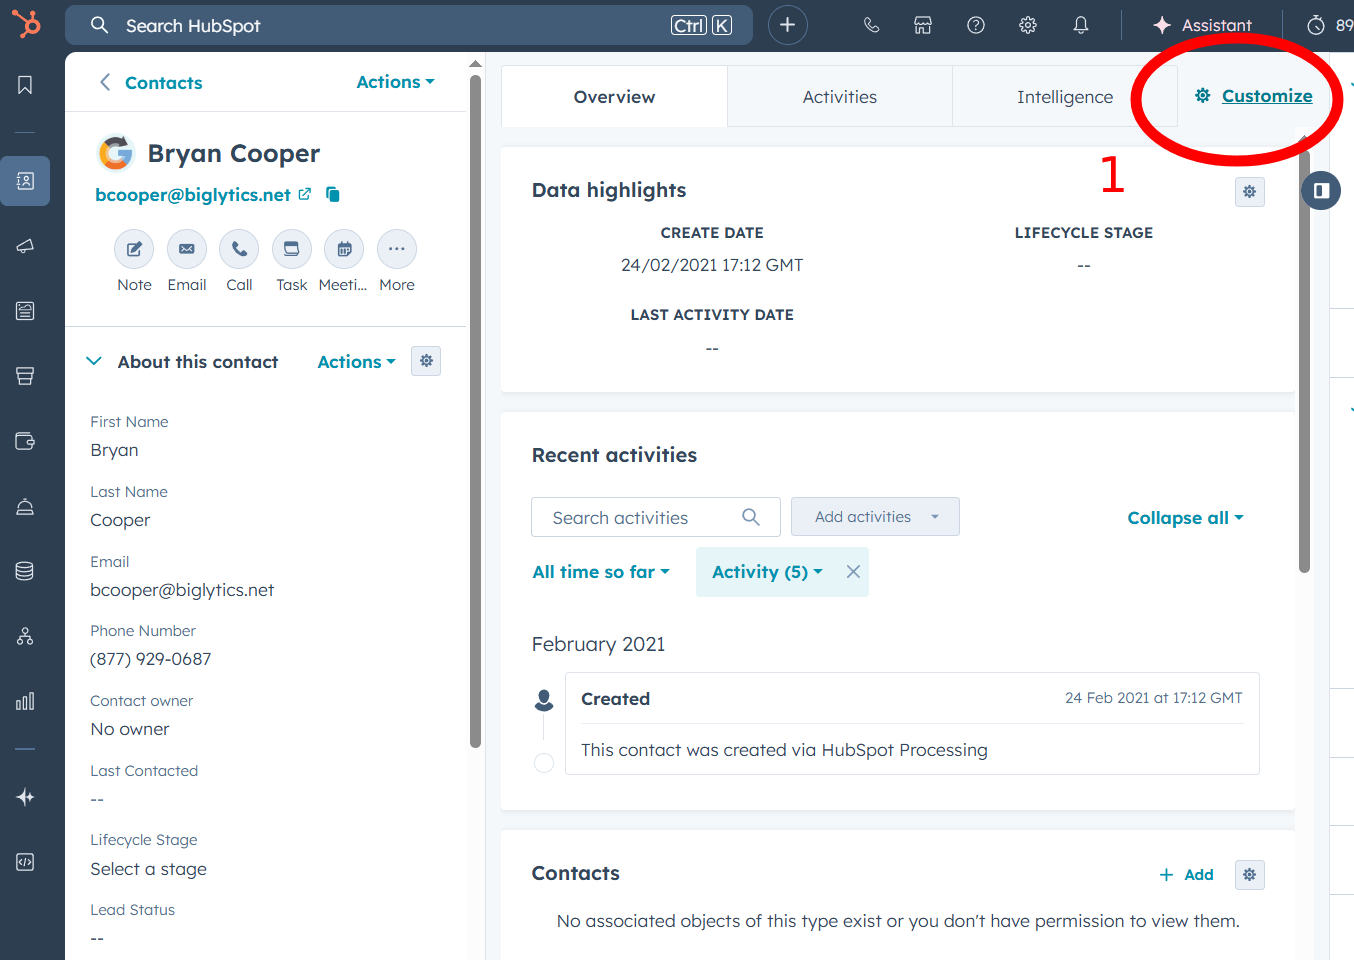
Customise Record
Open any Contact or Company record in HubSpot CRM and click "Customise record".
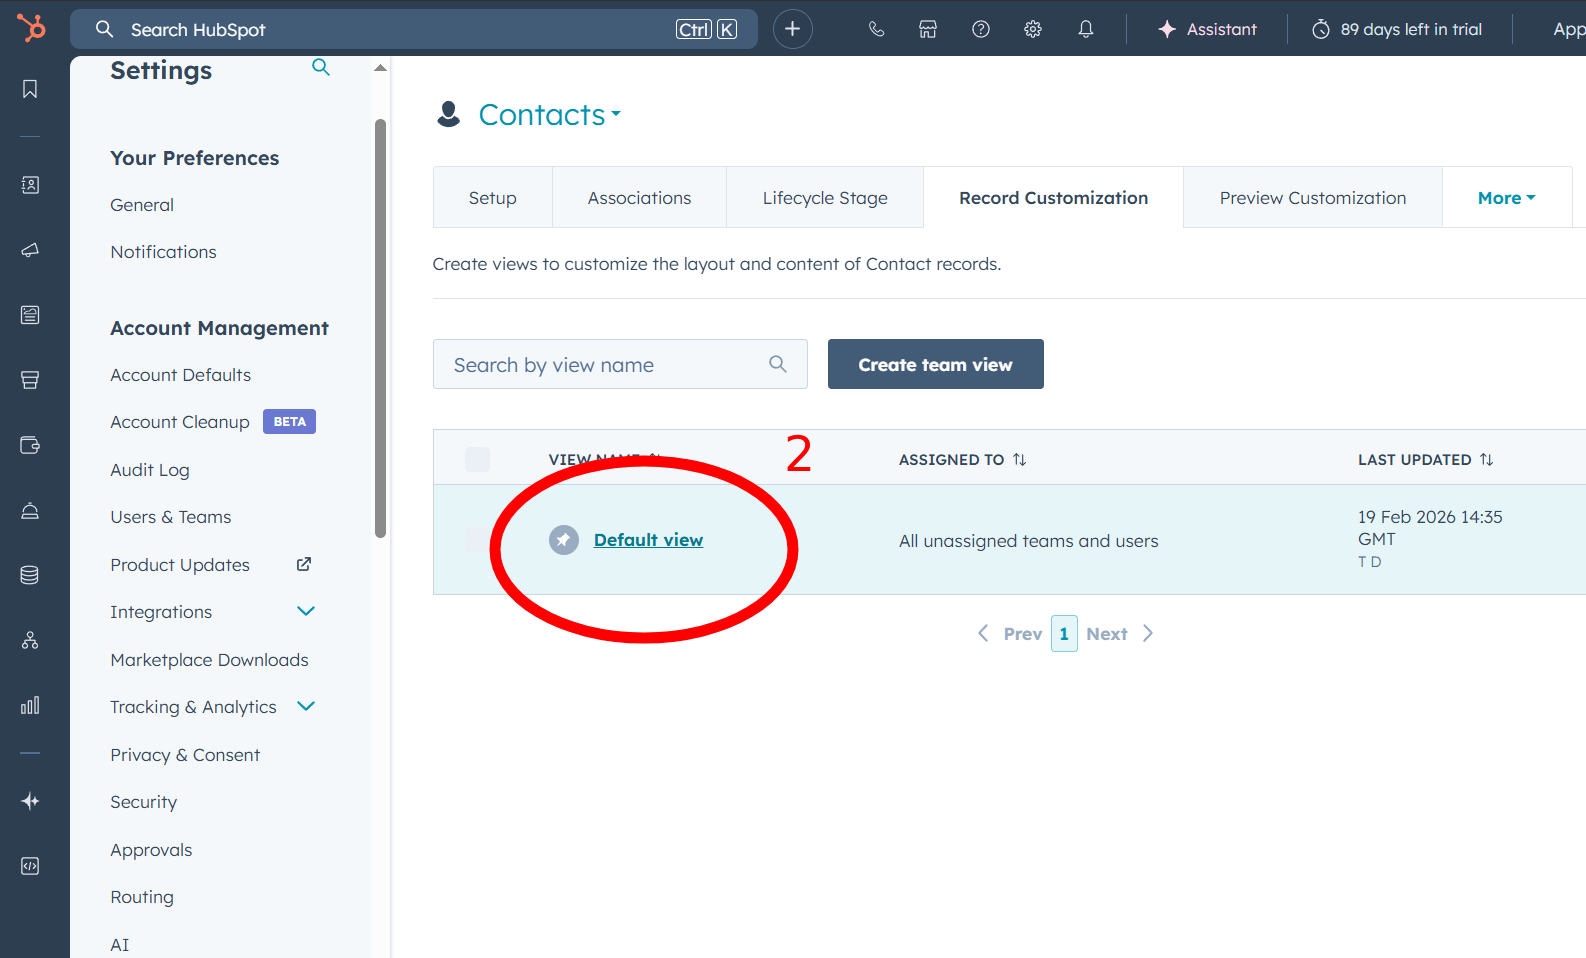
Select the Right Sidebar
Select the "Default view", or the view you're using, to edit it.
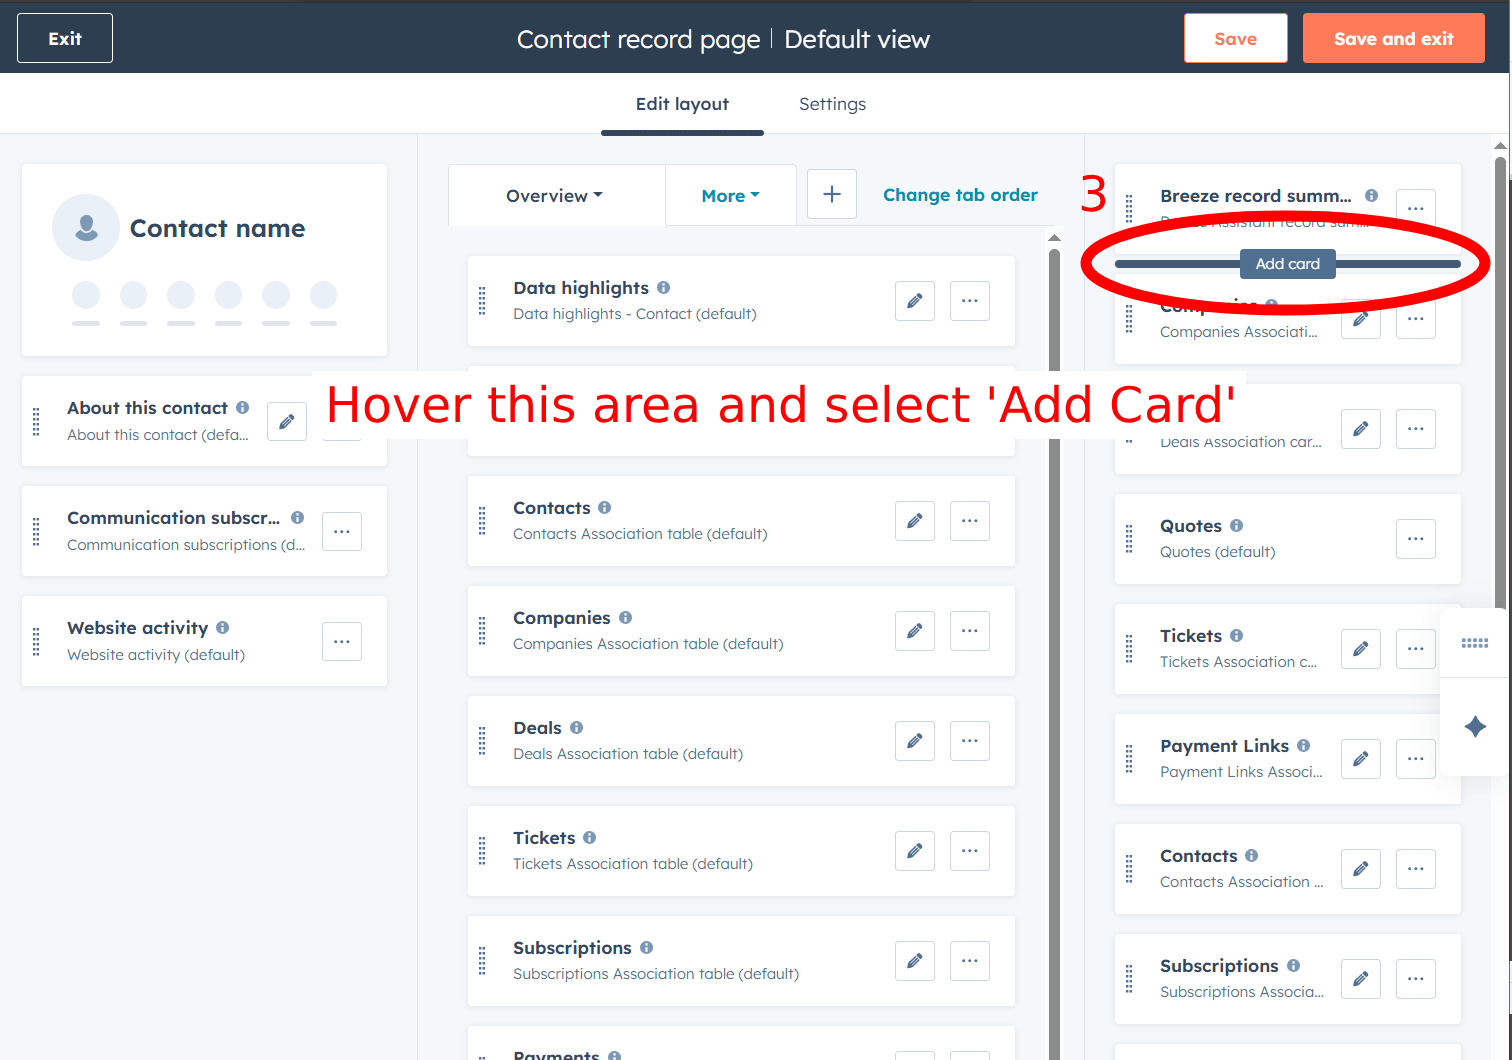
Add a Card
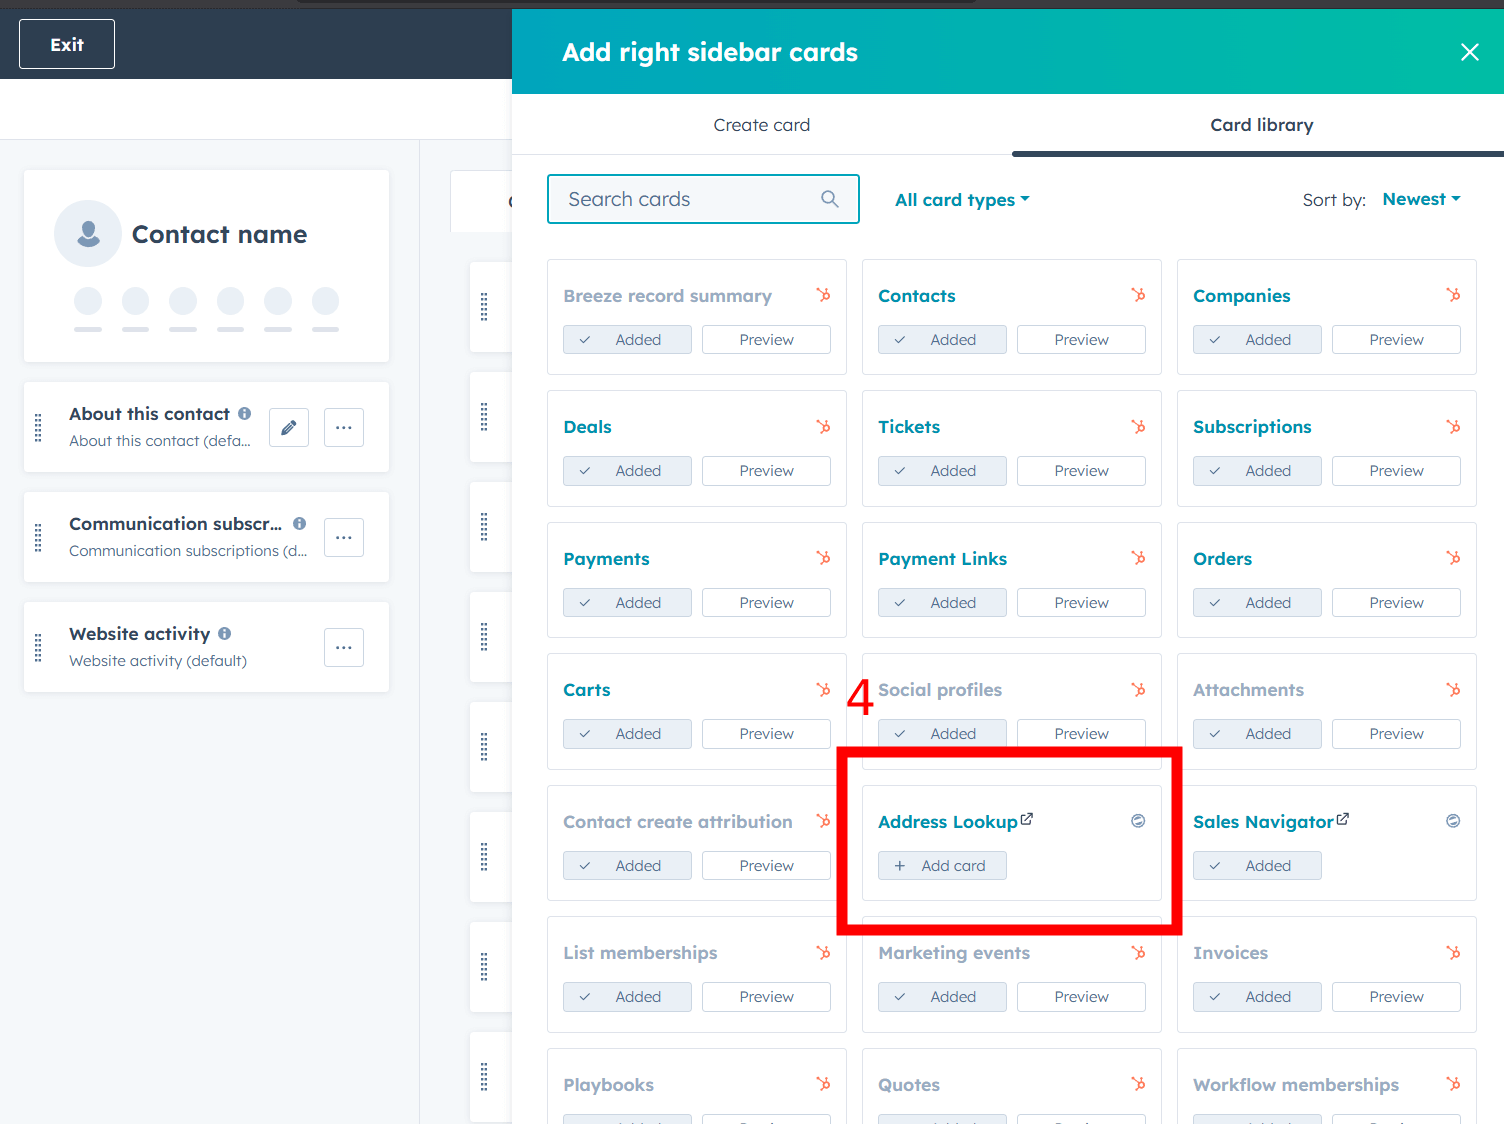
Click "Add card" to view the available cards you can add to the sidebar.
Select Address Lookup
Find "Address Lookup" in the list and select it to add the card to your layout.
Save and Exit
Click "Save and exit" to apply your changes.
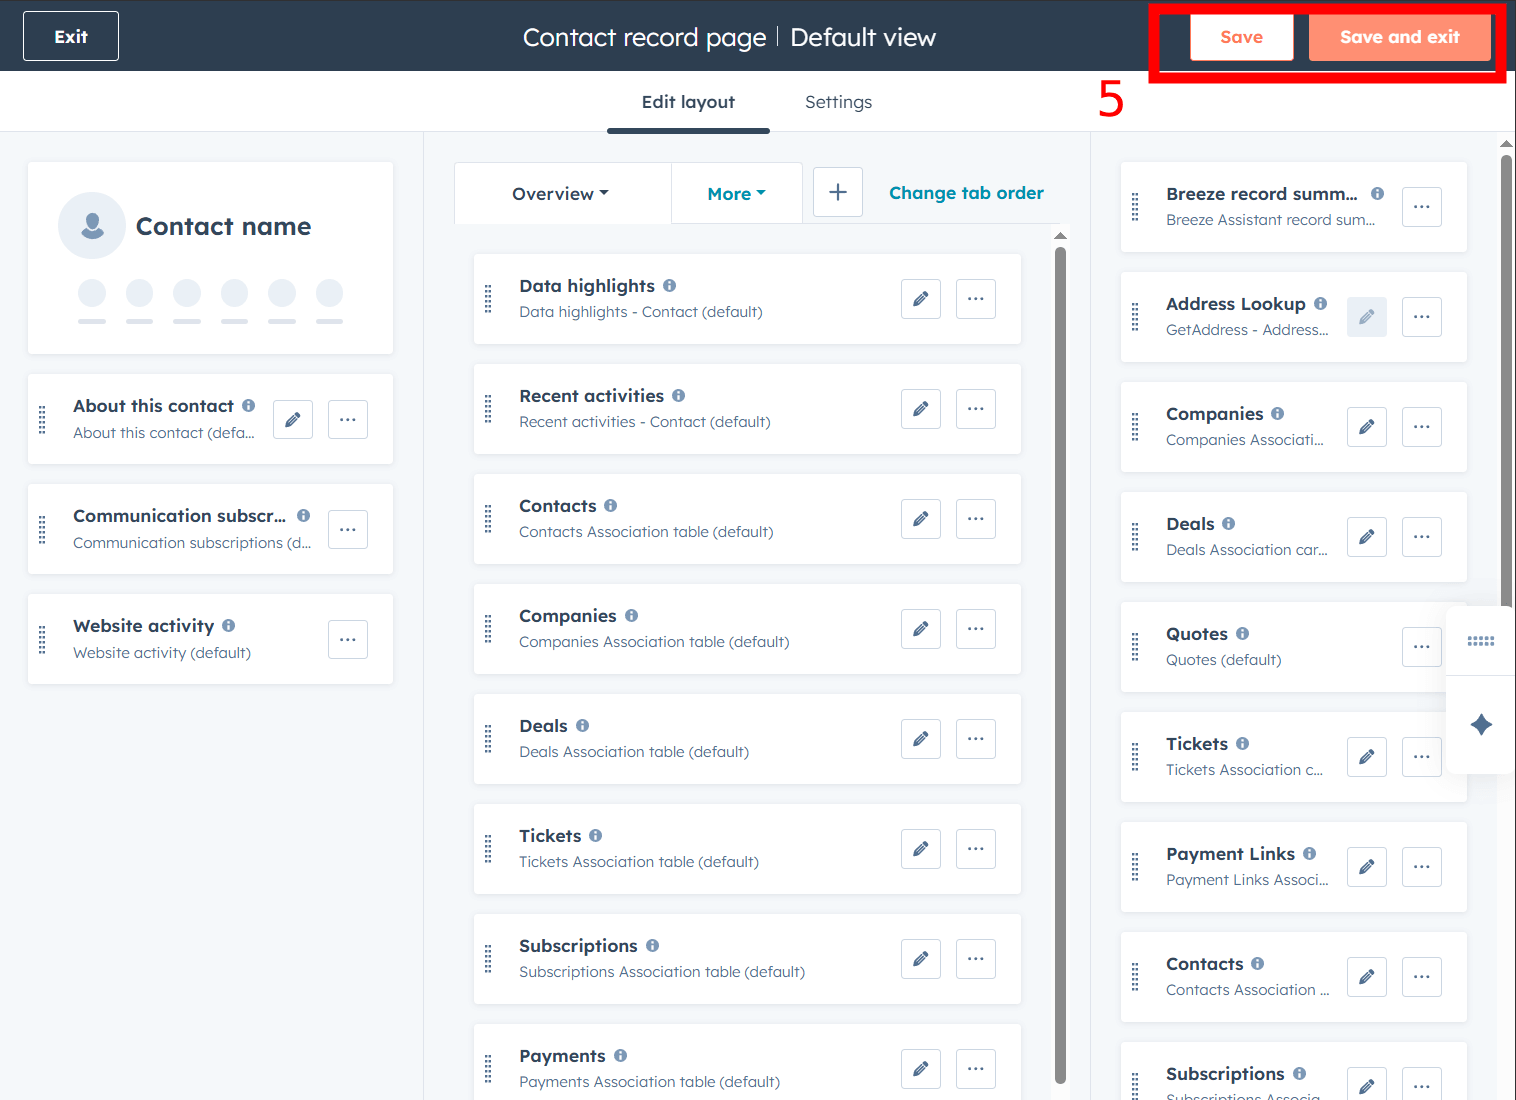
You only need to do this once — the card will then appear on all records of that type. Repeat for both Contacts and Companies if you want it on both.
Search for an Address
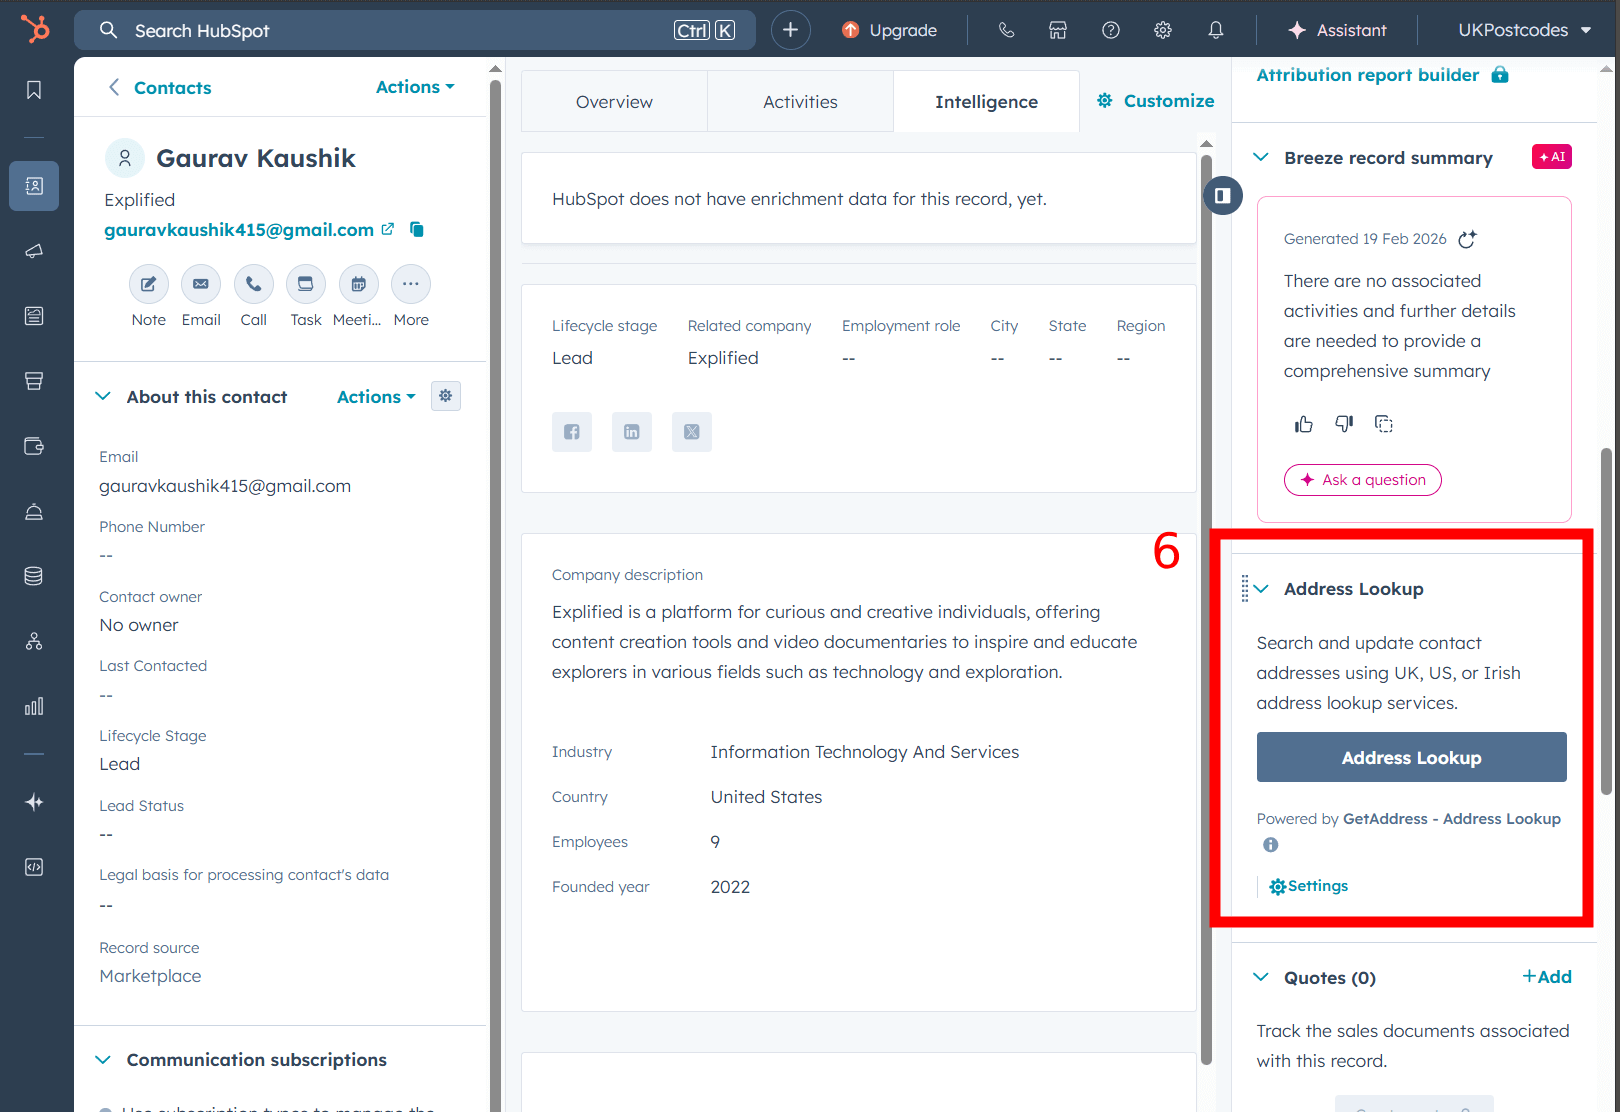
Open any Contact or Company record and find the Address Lookup card in the right sidebar. Click the "Address Lookup" button to open the search modal.
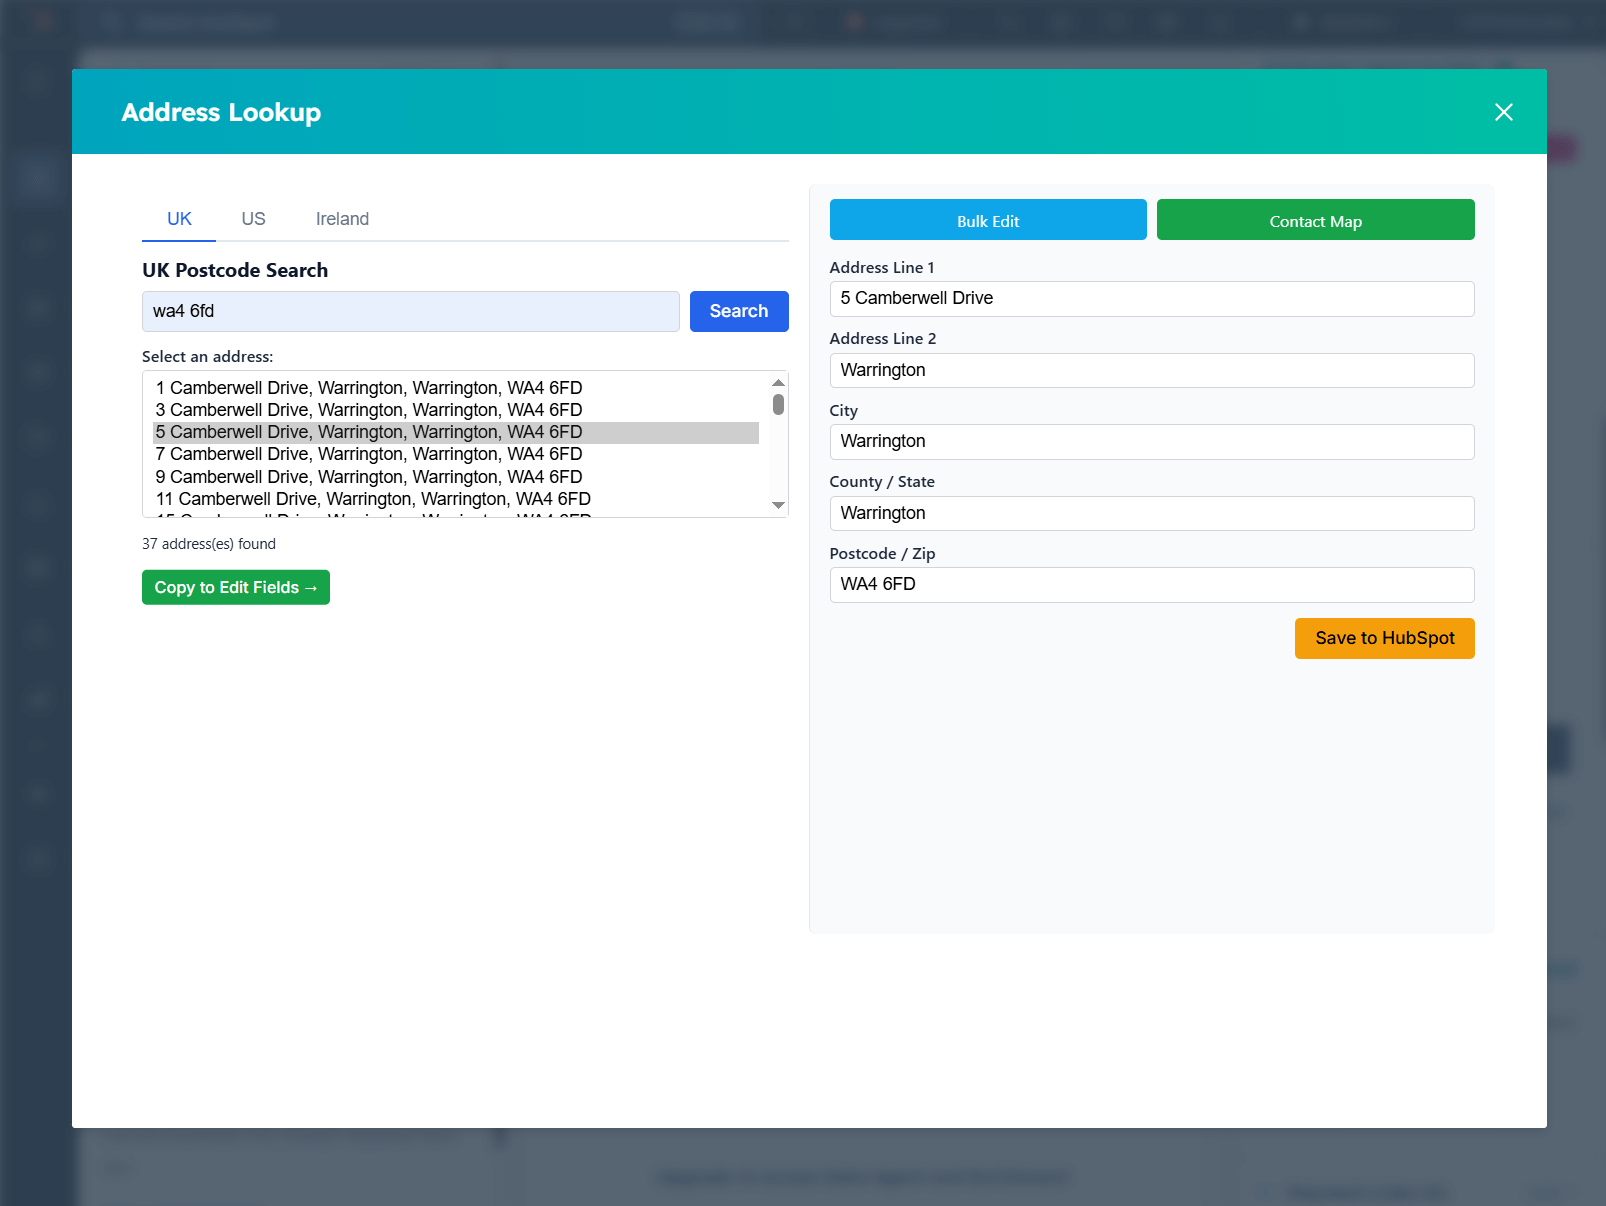
You will see country tabs for all supported regions:
- UK — Enter a UK postcode (e.g. SW1A 1AA) and click Search
- US — Start typing an address and select from autocomplete suggestions
- Ireland — Enter an Eircode (e.g. D02 AF30) and click Search
- France — Search by address or postcode
- Belgium — Search by postcode, street, and house number
- Spain — Search by address or location name
- Germany — Start typing an address and select from autocomplete suggestions
Select the correct address from the results. Click "Copy to Edit Fields" to populate the editable fields on the right, then click "Save to HubSpot".
Save to HubSpot
Review the address fields (Address, City, State/County, Postcode/ZIP). Make any adjustments if needed, then click "Save to HubSpot".
The address data is written directly to the Contact or Company record in your HubSpot CRM. You will see a success confirmation, and the modal will close automatically. The record's address fields update in-place — no page reload needed.
Configure Field Mapping (Optional)
If your HubSpot portal uses custom property names for address fields, you can configure field mapping:
- Go to your WordPress profile page
- Scroll down to the HubSpot Field Mappings section
- For both Contacts and Companies, use the dropdowns to map each standard field (Address, City, State, County, ZIP) to the corresponding HubSpot property in your portal
- Click Update Profile to save your mappings
If no mapping is set, GetAddress uses the default HubSpot property names.
Important: Address Line 2
- Address Line 2 is not configured via the field-mapping dropdowns above.
- HubSpot does not ship a standard Address Line 2 property. In HubSpot property settings, create a property on Contacts and/or Companies (whichever you use) whose internal name is exactly
address2. The display label can be anything (for example “Address Line 2”). - Then, on your WordPress profile, enable Update Address Line 2 under Optional Address Fields.
- Create the HubSpot property before enabling the toggle or testing saves. If the property is missing or uses a different internal name, Address Line 2 will not save correctly.
Bulk Update & Contact Map
Enterprise subscribers also have access to two additional tools.
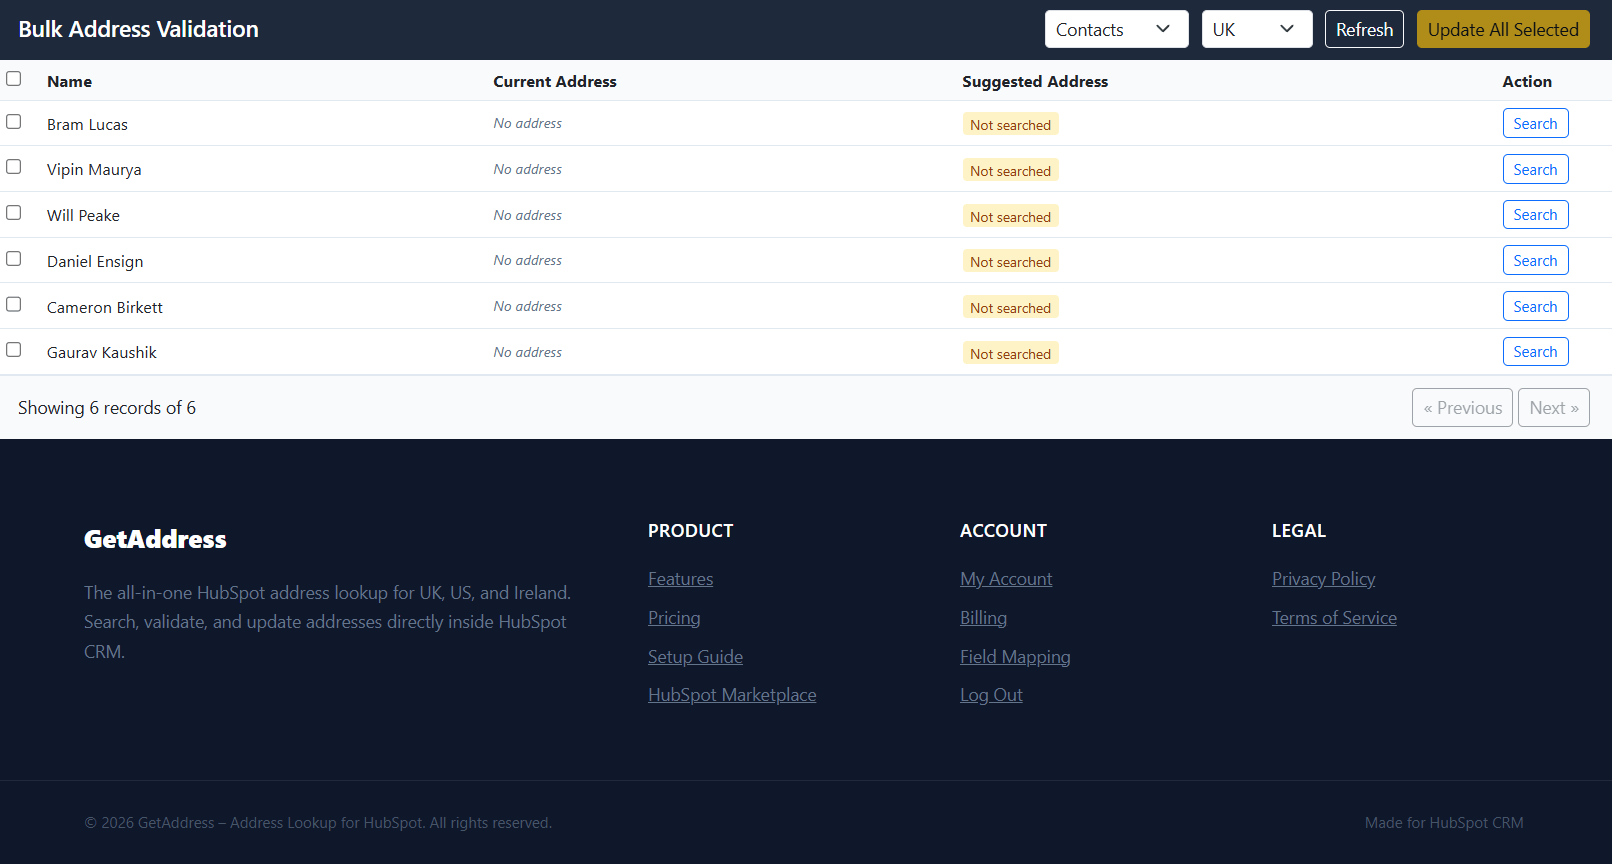
Bulk Address Validation
Access the Bulk Update page to review and update addresses across your entire CRM database.
The interface displays a paginated table of all contacts (or companies). For each row, click the search icon to open a multi-region address search modal. Select the correct address, mark the row for update, and then click "Update All Selected" to batch-save changes back to HubSpot.
Contact Map View
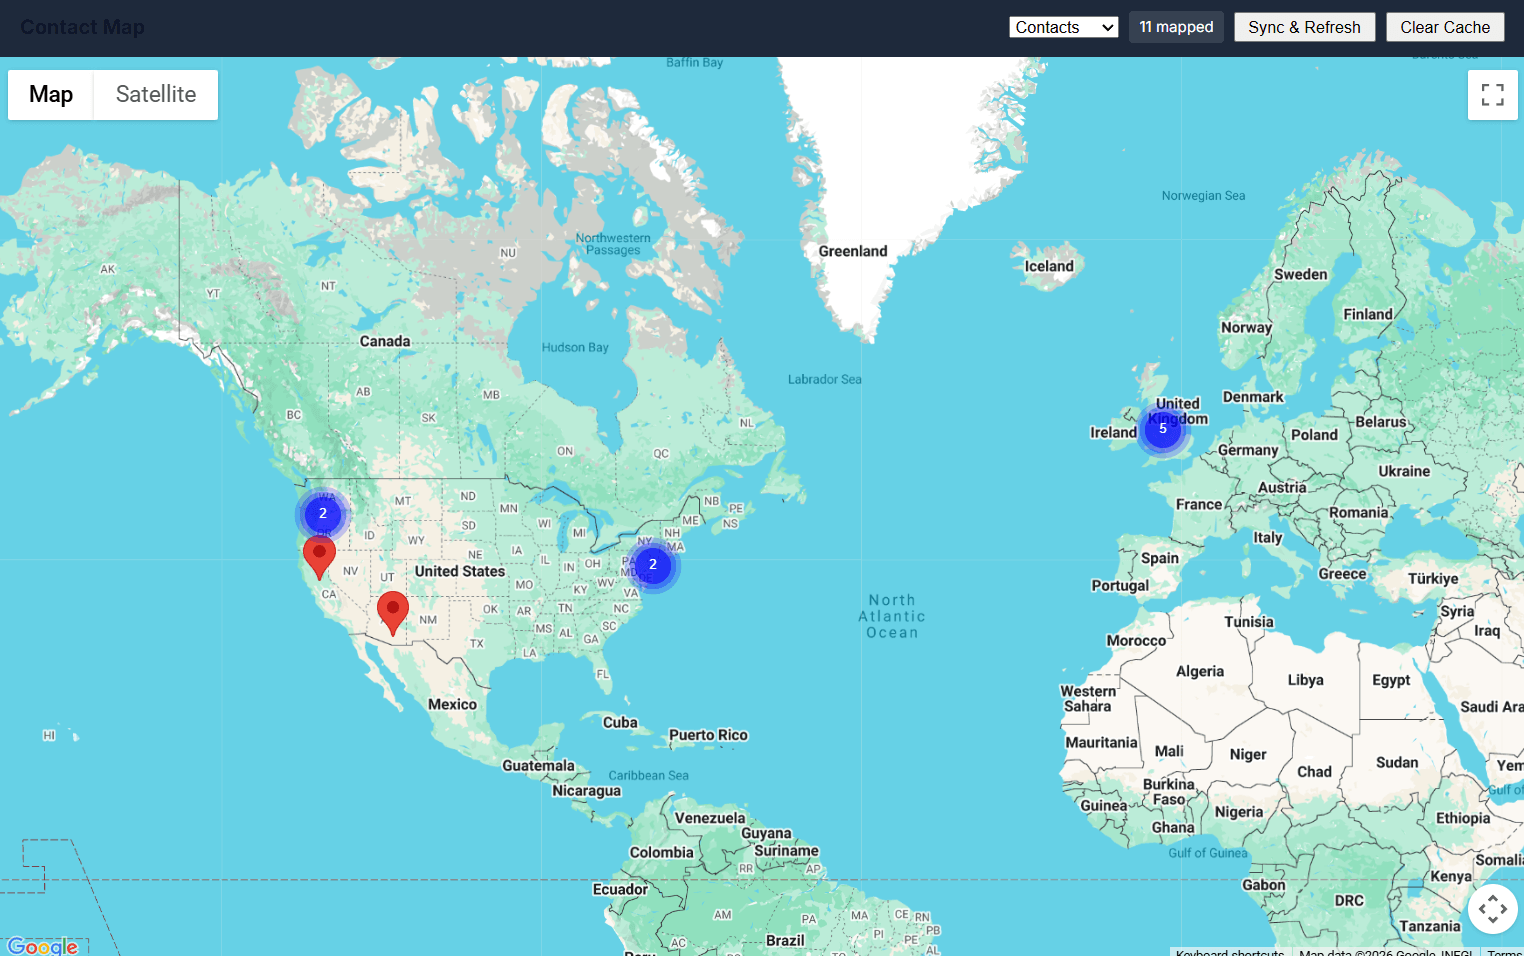
Access the Contact Map page to visualise your contacts and companies on an interactive Google Map.
Click "Sync & Refresh" to pull records from HubSpot and geocode their postcodes/ZIP codes. Markers appear with clustering for clean visualisation. Click any marker to see contact details in an info window.